Now we will look at how to control the rotation of the washing machine motor, speed and direction. This material is a continuation of the topic of connecting motors from SMA, raised by numerous requests from visitors to the site 2 Schemes .
Let us immediately note that this is a commutator motor, which does not require a starting capacitor. This engine is usually equipped with a tachometer, which, as part of the feedback, stabilizes the rotation speed. Without it, the engine may rev up excessively, leading to engine failure. Electric motors of this type are fast-acting and can produce even several thousand revolutions per minute, which can be a hindrance in some devices.
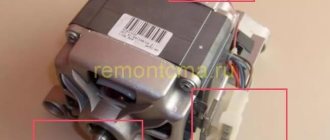
First of all, you need to read from the sticker on the engine body what power it has. Alternatively, check with a wattmeter plugged into a power outlet to see how much power the motor is using. These types of motors typically consume several hundred watts of power. Different sources indicate power consumption from 120 to 360 W.
The engine has two rotation speeds. At idle (during washing), the motor consumes 40 watts of power. The second rotation speed at which the engine consumes 300 W of power (during spin). These speeds are varied by corresponding switching of the windings on the motor stator. During spinning, the engine speed can even be several thousand rpm.
What is the power of the SM engine
The performance of the motor depends on its type. Three types of washing machines are used:
- asynchronous;
- collector;
- inverter (brushless).
Asynchronous motor
It was installed in cars manufactured before 2000. The motor of a semi-automatic washing machine has 2800 rotations per minute and a power of 180–360 W. To adapt such an engine for garage “homemade” products, you need a three-phase network, a frequency converter, and a set of capacitors. This is expensive, which is why asynchronous systems are not popular among do-it-yourselfers.
Brushed motor
A favorite of the masters. Powered by direct and alternating electric current, power 300–800 W, number of armature turns 11,500–15,000 rpm. On the plus side, the cycle can be easily adjusted without loss of power. The downside is that the brushes wear out often.
Inverter motor
The most modern and economical look. Converts alternating current to direct current. It operates without a belt drive and brushes with a power of 400–800 W, making a number of turns from 16,000 to 20,000 per minute.
Currently, a commutator electric motor is the best option for home workshops in terms of availability and price. It is versatile and easy to operate. Let's look at its structure, connection and adjustment methods.
Design Features
The microcircuit is equipped with everything necessary for high-quality engine control in various speed modes, from braking to acceleration and rotation at maximum speed. Therefore, its use greatly simplifies the design, while simultaneously making the entire drive universal , since you can select any speed with a constant torque on the shaft and use it not only as a drive for a conveyor belt or drilling machine, but also for moving a table.
The characteristics of the microcircuit can be found on the official website. We will indicate the main features that will be required to construct the converter. These include: an integrated frequency-to-voltage conversion circuit, an acceleration generator, a soft starter, a Tacho signal processing unit, a current limiting module, etc. As you can see, the circuit is equipped with a number of protections that will ensure stable operation of the regulator in different modes.
The figure below shows a typical circuit diagram for connecting a microcircuit.
The scheme is simple, so it is quite reproducible with your own hands. There are some features that include limit values and speed control method:
- The maximum current in the motor windings should not exceed 10 A (subject to the configuration shown in the diagram). If you use a triac with a large forward current, the power can be higher. Please note that you will need to change the resistance in the feedback circuit downward, as well as the inductance of the shunt.
- The maximum rotation speed is 3200 rpm. This characteristic depends on the type of engine. The circuit can control motors up to 16 thousand rpm.
- Acceleration time to maximum speed reaches 1 second.
- Normal acceleration is achieved in 10 seconds from 800 to 1300 rpm.
- The engine uses an 8-pole tachogenerator with a maximum output voltage of 30 V at 6000 rpm. That is, it should produce 8 mV per 1 rpm. At 15,000 rpm it should show 12 V.
- To control the motor, a 15A triac with a maximum voltage of 600 V is used.
If you need to organize a motor reverse, then for this you will have to supplement the circuit with a starter that will switch the direction of the excitation winding. You will also need a zero speed control circuit to give permission for reverse. Not shown in the picture.
The device of the commutator electric motor of an automatic washing machine
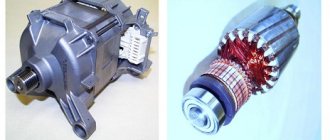
The appearance of motors of different models may differ, but the design and operating principle are almost identical. The device consists of:
- housings;
- starter;
- starter coils (shoes) with two or three terminals;
- anchors;
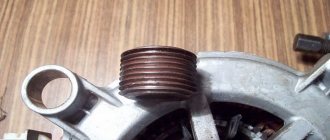
- pulley;
- two brushes;
- collector;
- tachometer (with two or three wires);
- terminal block.
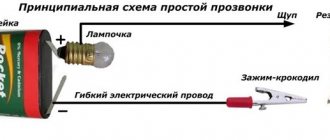
To connect the motor, you need to know the outputs of the armature, starter and tachometer windings. A tester will help you avoid getting tangled in wires.
Easy motor connection
Set the tester to the mode of least resistance and call the windings of the tachometer, coils and armature. Make connections through terminals that communicate with each other. A correctly connected device picks up speed smoothly, does not crackle or spark. You can check how many revolutions the motor makes using a speed sensor.
A visual step-by-step implementation can be seen in this video:
Single-phase frequency converter
The compact frequency conversion device is used to control single-phase electric motors for household equipment. Most frequency converters have the following design capabilities:
- Most models use the latest vector control technologies in their design.
- They provide improved torque for single-phase motors.
- Energy saving is set to automatic mode.
- Some models of frequency converters use a removable control panel.
- Built-in PLC controller (it is indispensable for creating data collection and transmission devices, for creating telemetry systems, and integrates devices with various protocols and communication interfaces into a common network).
- Built-in PID controller (monitors and regulates temperature, pressure and technological processes).
- The output voltage is adjusted automatically.
Fig. No. 7. Modern Optidrive converter with basic functional features.
The frequency converter does not serve for double voltage conversion; due to the presence of a PWM regulator in the design, it can increase the voltage value by no more than 10%.
The main task of a single-phase frequency converter is to provide power to both single- and three-phase electric motors. In this case, the motor current will correspond to the connection parameters from a three-phase network and remain constant
How to adjust rotation
There are many ways to control speed:
- laboratory autotransformer;
- adjustment board for household appliances;
- screwdriver buttons, grinders;
- lighting regulators (switches, toggle switches).
The adjustment scheme is simple, you can do it yourself.
This is a satisfactory option for a pump or fan. For more powerful mechanisms (for example, machine tools), a different regulator circuit will be needed.
Read also: Active power of a transformer formula
The essence of the question is how to reduce speed without losing performance? The connection is made through a tachogenerator, which transmits the number of turns to the speed controller microcircuit, which coordinates the cycle using a thyristor.
Such a board allows you to either increase or decrease the speed, but requires constant, intensive cooling due to overheating. A detailed video about how the speed and power of the stroke are regulated by connecting to the microcircuit can be viewed here:
Now you know what speed different types of engines make and how to set up this process in your home workshop. Good luck!
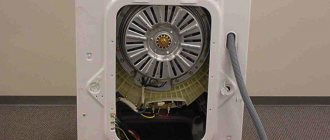
Washing machines, like any household appliance, tend to break down. And it’s good if the breakdown can be corrected at low financial cost. But alas, there are times when there is no point in repairing a washing machine, since it is easier and cheaper to buy a new unit. But what to do with the old one? Moreover, if its engine is in excellent condition and continues to work properly.
Speed control relay
Types of motors
Asynchronous
Main advantages:
- Simplicity of design.
- Easy maintenance.
- Fairly low noise level.
- Inexpensive cost.
Among the disadvantages, it can be noted that it has:
- low efficiency and;
- impressive in size.
Often such engines are used in inexpensive washing machines.
Asynchronous motor
Collector
Main advantages:
- Modest dimensions.
- Huge starting point.
- Simplicity of the control circuit.
Flaws:
- Short service life.
- Weakening of the magnetic field, which subsequently prevents the drum from rotating.
Collector engine
Direct drive
Main advantages:
- Simplicity of design.
- It has an efficiency higher than that of other types of engines, while the vibrations of the machine are much lower.
- The sound level emanating from the MCA is also low.
Flaws:
- Due to the complexity of the circuit, manufacturers need to put in more effort, which increases the cost.
Are you unplugging your washing machine?
Oh yes! No
Necessary unnecessary things
Many people will simply take the car to a junkyard and forget about it. But this is not a solution to the problem for a zealous and skillful owner. You would be surprised to know where and what parts of a washing machine could be used in a household. And in our article we will talk about the most valuable part of this unit - the working engine of an automatic washing machine.
The most suitable option for using an electric motor is to connect it to another device. For example, an electric grinding machine (or any other). But to do this, first of all, you need to connect the motor to a 220 V household network and adjust the number of its revolutions.
Measurements
It is clear that the number of revolutions needs to be determined somehow. Tachometers are used for this. They show the rotation number at the moment. You can’t simply measure speed with a regular multimeter, except in a car.
As you can see, on electric machines you can change various parameters, adjusting them to the needs of production and household use.
DIY birthday decor
Close…
Pointed-toe cowboy bootsThe principle of operation of a homemade lock is as follows. In one half there is a permanent magnet. and in the other there is a metal plate. One of them is attached to the door. The second, with the metal plate removed, is equipped with a KEM-1 reed switch and attached to the door frame. If the door is in the closed position, the two parts of the lock are pressed, the magnet acts on the reed switch, closing its contacts. If the door opens, the magnet goes away and the reed switch contacts open.
The battery, the computer system unit, even the power supply for a laptop are all best friends. I’m already silent about such good hot water bottles as my husband and I.
Take the filler and stuff the doll. When the stuffing is completely evenly distributed, sew the product up. The handles must be sewn to the body almost near the neck.
From one pallet, sanded, impregnated and varnished, you get a garden table like a coffee table, on the left in Fig. If you have a pair in stock, you can make a wall-mounted work desk-rack out of them in literally half an hour, in the center and on the right. You can also weave chains for it yourself from soft wire, covered with a PVC tube or, better, heat-shrinkable. To fully raise the tabletop, small tools are placed on the shelf of a wall pallet.
Well, if you fill a glass bowl, vase, candy dish, punch vessel or ordinary glasses with water, scattering sea pebbles on the bottom, and let the candle-tablets float freely, you will get magical lighting for a romantic New Year. For a more interesting and unexpected effect, you can experiment with the color of the water. How are studs installed on rubber?
Handmade toys for children are beautiful, cheap and enjoyable. Every child needs original and educational toys, but it is not always possible to purchase them. Today we will show you 5 examples of fun toys that you can make yourself. They can be made from cardboard, paper or wood. In general, be inspired and make your children happy more often.
For the base of such a structure, you can use thick plywood, and for its upper part - polycarbonate. Finding solar panels online today is also not a problem.
Attention! When joining panels, do not use too much force, as you may damage the joint. This is exactly how many knives a housewife should have in her kitchen so that the cooking process is always simple and enjoyable.
This is exactly how many knives a housewife should have in her kitchen so that the cooking process is always simple and enjoyable.
To make a feeder with your own hands we will need:
Timber calculation. The boards, called staves, have biconvex sides to give the cooperage product a convexity. To make them like this, you need to take the lower part of a tree trunk and split it, similar to chopping wood. If you cut it carefully, the natural integrity of the fibers will be disrupted, which is bad for such a product. You shouldn’t start figure sawing right away - the logs need to be dried for 2 months. Moreover, dry it not under the scorching sun, but in a dark, cool room.
How to weave bracelets from laces
The fact that most New Year's costumes for preschool children are easily sewn on the basis of overalls can significantly narrow and facilitate creative search. If you learn how to sew a jumpsuit - the basis for a New Year's costume and come up with (draw from) and make decorative elements for it with your own hands, then you can make amazing and quite interesting models of New Year's outfits for children. The main thing is to think through everything in advance to the smallest detail, arm yourself with knowledge on the topic - so that the result of the work will pleasantly surprise and delight everyone.
Wardrobe design
Images
DIY birthday gift for mom photo instructions
Similar news
.
With the ever-increasing growth of automation in the domestic sector, there is a need for modern systems and devices for controlling electric motors.
Control and frequency conversion in small-power single-phase asynchronous motors, launched using capacitors, allows you to save energy and activates the energy saving mode at a new, progressive level.
Connection to 220 Volt
In order to connect the electric motor to the home electrical network, you will need a multimeter.
With its help we call the output wires coming from the electric motor. The purpose of this operation: to detect among the wires (from 2 to 4 pieces) two with the highest resistance (about 12 Ohms). Accordingly, if there are only 2 wires, then the task is simplified to a minimum. At the moment we have on hand two power wires from the excitation coil of the washing machine motor.
Next, we identify the wires from the commutator and engine brushes. There are also two of them, so it is impossible to confuse them.
The third pair of wires we need belongs to the tachometer. They are mainly attached to the engine housing. Otherwise, you will have to partially disassemble it (the motor).
We connect one of the collector wires to the coil wire. And we connect the remaining pair (collector - coil) in a convenient way to a 220 Volt network. We are conducting a test run.
If you do not know what the parts we named mean and what they look like: excitation coil, collector, tachometer, and so on, it is better to postpone reading this article until you become familiar with the structure and principle of operation of the commutator motor of an automatic washing machine.
Read also: How to make a compressor receiver from a gas cylinder
Control principle
When the rotation speed of the motor shaft is set by a resistor in output circuit 5, a sequence of pulses is formed at the output to unlock the triac by a certain angle. The speed of rotation is monitored by a tachogenerator, which occurs in digital format. The driver converts the received pulses into an analog voltage, which is why the shaft speed is stabilized at a single value, regardless of the load. If the voltage from the tachogenerator changes, the internal regulator will increase the level of the output control signal of the triac, which will lead to an increase in speed.
The microcircuit can control two linear accelerations, allowing you to achieve the dynamics required from the engine. One of them is installed on the Ramp 6 output of the circuit. This regulator is used by washing machine manufacturers themselves, so it has all the advantages to be used for domestic purposes. This is ensured by the presence of the following blocks:
- Voltage stabilizer to ensure normal operation of the control circuit. It is implemented at pins 9, 10.
- Rotation speed control circuit. Implemented using MS pins 4, 11, 12. If necessary, the controller can be switched to an analog sensor, then pins 8 and 12 are combined.
- Starting impulse block. It is implemented at pins 1, 2, 13, 14, 15. It adjusts the duration of control pulses, delays, generates them from a constant voltage and calibrates.
- Sawtooth voltage generation device. Pins 5, 6 and 7. It is used to control the speed according to the set value.
- Control amplifier circuit. Pin 16. Allows you to adjust the difference between the set and actual speed.
- Current limiting device at pin 3. When the voltage on it increases, the triggering angle of the triac decreases.
The use of such a circuit ensures full control of the commutator motor in any mode. Thanks to forced acceleration control, it is possible to achieve the required acceleration speed to a given rotation speed. Such a regulator can be used for all modern washing machine motors used for other purposes.
https://youtube.com/watch?v=yLHAaZTr0hQ
Adjusting the engine speed of an automatic washing machine
The rotation speed of the motor plays an important role in its further application. There are a large number of circuits and printed circuit boards on the basis of which the electric motors of washing machines are connected. And an even larger number of motor speed control boards from a homemade washing machine, which are sometimes much more efficient and of higher quality than their factory-made counterparts. Let's consider two schemes for adjusting engine speed from a washing machine.
Advantages and disadvantages
The widespread use of asynchronous motors with squirrel cage rotors is due to their undeniable advantages:
- stability of operation at optimal loads;
- high operational reliability;
- low operating costs;
- durability of operation without maintenance;
- relatively high efficiency indicators;
- low cost compared to models based on wound rotors and other types of electric motors.
Disadvantages include:
- high starting currents;
- sensitivity to voltage changes;
- low slip coefficients;
- the need to use devices such as frequency converters, starting rheostats, etc., to improve the characteristics of the electric motor;
- Electric motors with a squirrel-cage rotor require additional switching control devices in cases where there is a need to regulate the speed.
Electric motors of this type have decent mechanical characteristics. Despite their shortcomings, they are leaders in terms of their application rates.
Voltage regulator
The simplest and most accessible regulator of the speed of the electric motor of a washing machine is any device designed for such actions. It could be:
- Dimer;
- Electric drill trigger;
- A swivel wheel, etc., taken from any household appliance or purchased from a store.
The meaning of the operation for adjusting the speed is simple and consists in reducing or increasing the voltage supplied to the engine from a 220 Volt network. That is, by turning the adjustment wheel, we regulate the voltage, and therefore set the rotation speed. The diagram of this connection looks like this:
- We connect the wire from the coil (1) to the cable coming from the armature.
- We direct the 2-reel wire to the network.
- We close the remaining cable (2) of the armature to a dimer.
- The second output of the dimer is to the network.
- We test run the electric motor and operate the regulator.
If you haven't mixed anything up, the engine will obediently change its speed. But there will be one big problem. When touching the rotating axis of the motor, it will stop. That is, at the slightest outside influence, a loss of power occurs, regardless of the applied voltage. Essentially, we have a working engine on our hands without any useful functions.
The easiest way
Many power tools that use commutator motors have a small rheostat installed, which can be used to control the rotor speed with virtually no loss of power. Such an element can be removed from a faulty drill, screwdriver or hammer drill and installed in series with an electric motor. If a suitable rheostat is not available, then such a part can be purchased inexpensively at a specialized store.
A small difficulty is that the working stroke of such an adjustment mechanism is very small and it can be very difficult to set the engine speed at the required level. This problem is usually solved by installing additional mechanical converters of mechanical energy. This way, it will be possible to correctly set the rotor speed, as well as ensure that the device is fixed at the required level.
In addition to rheostats from hand-held electric tools, you can use ready-made store-bought devices that just need to be plugged into an outlet, and the motor leads connected directly to the adjusting device. Such products allow you to change the voltage over a very wide range, so choosing the position of the control toggle switch for certain engine speeds will not be difficult. An important advantage of store-bought rheostats is the ability to use them with other electronic devices, that is, it is enough to purchase a product once, with which you can adjust a large number of devices, not limited to electric motors.
Single-phase frequency converter
The compact frequency conversion device is used to control single-phase electric motors for household equipment. Most frequency converters have the following design capabilities:
- Most models use the latest vector control technologies in their design.
- They provide improved torque for single-phase motors.
- Energy saving is set to automatic mode.
- Some models of frequency converters use a removable control panel.
- Built-in PLC controller (it is indispensable for creating data collection and transmission devices, for creating telemetry systems, and integrates devices with various protocols and communication interfaces into a common network).
- Built-in PID controller (monitors and regulates temperature, pressure and technological processes).
- The output voltage is adjusted automatically.
Fig. No. 7. Modern Optidrive converter with basic functional features.
The frequency converter does not serve for double voltage conversion; due to the presence of a PWM regulator in the design, it can increase the voltage value by no more than 10%.
The main task of a single-phase frequency converter is to provide power to both single- and three-phase electric motors. In this case, the motor current will correspond to the connection parameters from a three-phase network and remain constant
